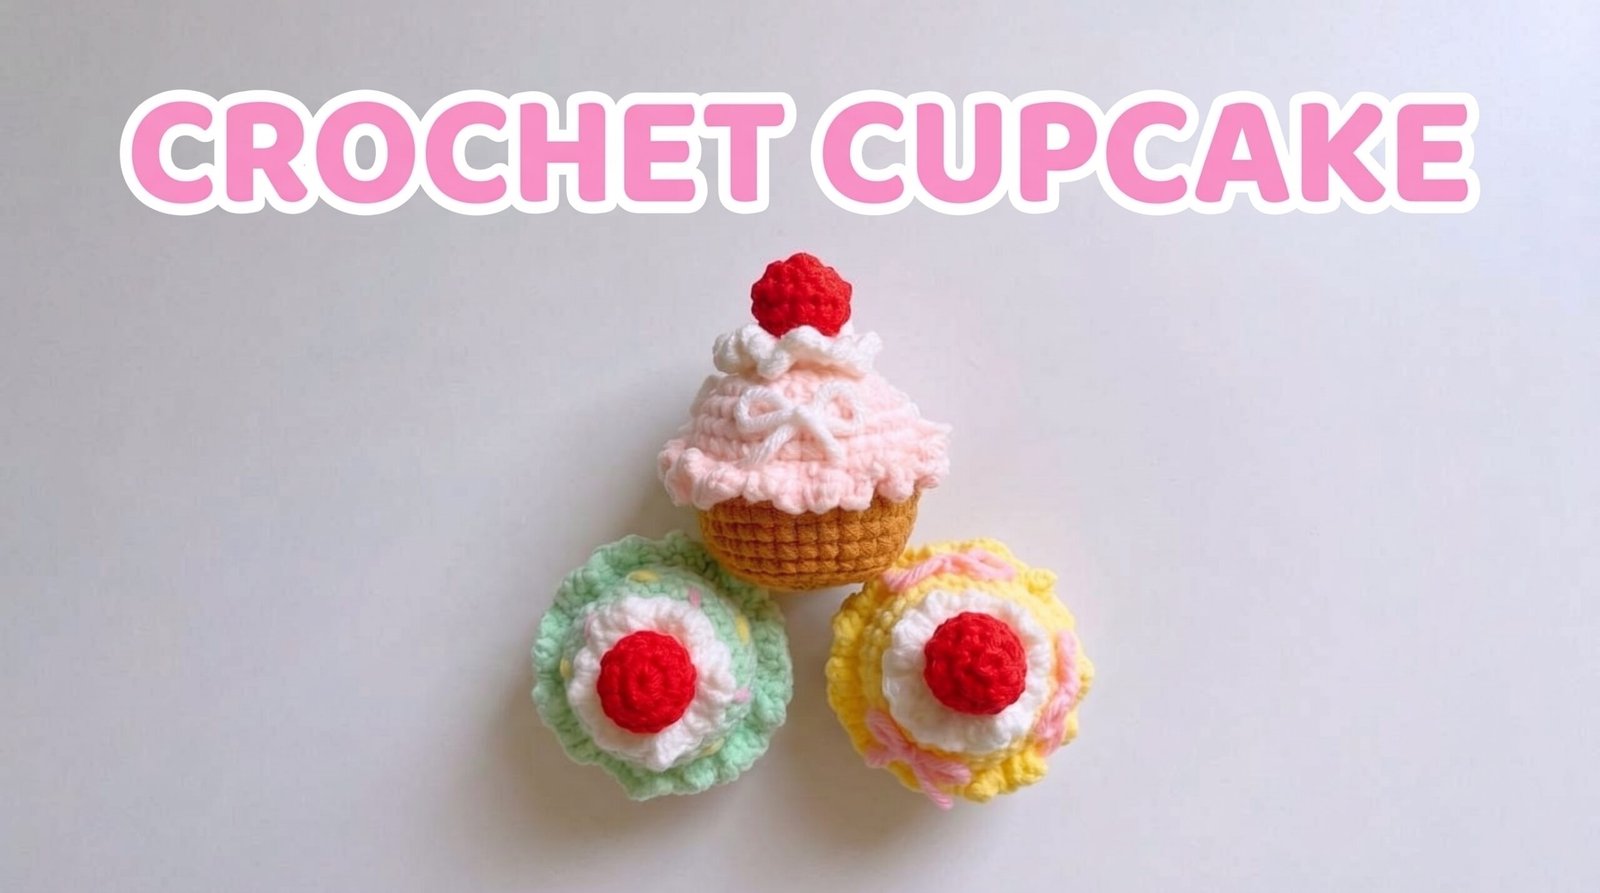
Small crochet projects are often the most satisfying: they use very little yarn, work up quickly, and turn into something you can actually carry or gift. This crochet cupcake keychain checks every one of those boxes. It has a softly ribbed cupcake wrapper, a rounded frosting top, a tiny cherry, and a sturdy hanging loop for attaching it to keys, backpacks, zipper pulls, or project bags.
The pattern below is written for confident beginners using US crochet terminology. If you can make a magic ring, single crochet, increase, decrease, double crochet, and work in the back loop, you can make this project. The finished cupcake is intentionally compact, so it is also a useful way to practice amigurumi tension without committing to a large toy.
Use classic bakery colors, match a friend’s favorite palette, or turn leftover yarn into a whole tray of tiny cupcakes. The same construction can be customized into chocolate, strawberry, lemon, birthday-cake, or minimalist neutral versions.
Quick Pattern Details
| Skill level | Confident beginner |
| Terminology | US crochet terms |
| Finished size | About 2.75 in / 7 cm tall, excluding key ring |
| Crochet hook | 3.0 mm or size needed for firm stitches |
| Yarn | DK or light worsted cotton/acrylic scraps |
| Construction | Worked in continuous rounds, then sewn together |
| Approximate time | 45-75 minutes |
| Gauge | Not critical; keep stitches tight enough to hide stuffing |
Materials You Will Need
- DK or light worsted yarn in a cupcake-wrapper color
- DK or light worsted yarn in a frosting color
- A small amount of red yarn for the cherry
- Scrap yarn or embroidery floss for sprinkles
- 0 mm crochet hook
- Polyester fiberfill or another light stuffing
- Yarn needle
- Scissors
- Stitch marker
- Metal key ring, split ring, or lobster-clasp keychain hardware
Cotton yarn gives the cupcake crisp stitch definition, while acrylic tends to feel a little softer and springier. Either works well. For a neat amigurumi finish, choose a hook slightly smaller than you might use for a drapey fabric so the stuffing does not peek through.
Materials for a crochet cupcake keychain: yarn, crochet hook, stuffing, yarn needle, and key ring.
Crochet Abbreviations
| MR | magic ring |
| ch | chain |
| sc | single crochet |
| inc | increase: 2 sc in the same stitch |
| dec | decrease: single crochet 2 stitches together |
| dc | double crochet |
| sl st | slip stitch |
| BLO | back loop only |
| st(s) | stitch(es) |
| rnd | round |
| NOTE This pattern uses US crochet terminology. Stitch counts appear in parentheses at the end of each round so you can check your work before moving on. |
Before You Start
Work in continuous rounds unless a step specifically tells you to join. Place a stitch marker in the first stitch of every round and move it up as you work. A small project magnifies tension differences, so count your stitches often and avoid overstuffing.
For the strongest keychain, the hanging loop should be sewn through several stitches at the top of the frosting rather than attached to a single strand. If the finished keychain is intended for a child, omit loose beads or other small detachable embellishments and treat it as an accessory rather than a toy.
Free Crochet Cupcake Keychain Pattern
Part 1: Crochet the Cupcake Liner
With the cupcake-wrapper color, make a magic ring.
- Rnd 1: Work 6 sc into the MR. (6)
- Rnd 2: Inc in each st around. (12)
- Rnd 3: [Sc in next st, inc in next st] 6 times. (18)
- Rnd 4: Working in BLO, sc in each st around. (18)
- Rnd 5: [Sc in next 2 sts, inc in next st] 6 times. (24)
- Rnds 6-8: Sc in each st around. (24)
Fasten off, leaving a sewing tail about 12 in / 30 cm long. The liner should look like a shallow cup with a slightly wider opening than the base.
| TIP Want a more defined cupcake-wrapper look? Before assembly, add 6-8 loose vertical surface-slip-stitch lines from the bottom edge toward the top. Keep them relaxed so the liner does not pucker. |
Part 2: Make the Frosting
With the frosting color, make a magic ring.
- Rnd 1: Work 6 sc into the MR. (6)
- Rnd 2: Inc in each st around. (12)
- Rnd 3: [Sc in next st, inc in next st] 6 times. (18)
- Rnd 4: [Sc in next 2 sts, inc in next st] 6 times. (24)
- Rnd 5: Sc in each st around. (24)
- Rnd 6: [Sc in next 3 sts, inc in next st] 6 times. (30)
- Rnd 7: *Sl st in next st, 5 dc in next st, sl st in next st, sc in next 2 sts; repeat from * 5 more times. This creates six soft frosting scallops.
Fasten off with a long sewing tail. Do not stuff the frosting yet.
Part 3: Crochet the Cherry
With red yarn, make a magic ring.
- Rnd 1: Work 6 sc into the MR. (6)
- Rnd 2: Inc in each st around. (12)
- Rnds 3-4: Sc in each st around. (12)
- Rnd 5: Dec around. (6)
Add a tiny pinch of stuffing, fasten off, and thread the yarn tail through the front loops of the remaining stitches. Pull closed and leave the tail for sewing.
Part 4: Make the Keychain Loop
Using the frosting yarn or another strong matching yarn, ch 14. Sl st into the first chain to form a loop. Fasten off with two long tails. You can make this loop shorter or longer depending on your hardware.
Three-step construction diagram showing the crochet cupcake liner, frosting, and final keychain assembly.
How to Assemble the Cupcake
- Lightly stuff the cupcake liner. Keep the bottom flat rather than packing it into a round ball.
- Place the frosting over the liner opening. The scallops should sit just outside the upper edge like a piped frosting border.
- Pin or hold the pieces in place. Using the frosting tail, sew the frosting to the liner around the full circumference. Add a little more stuffing before closing the final inch if needed.
- Position the crochet hanging loop at the center top. Sew both loop tails through several nearby stitches, knot securely inside the frosting, and weave in the ends.
- Sew the cherry over the loop attachment point. This hides the join and gives the cupcake a finished bakery-style top.
- Embroider short sprinkles across the frosting using small straight stitches. Keep the color placement irregular so the surface looks playful rather than striped.
- Attach the metal key ring to the crochet loop and tug firmly to test the connection.
| TIP A neat keychain should feel lightly stuffed, not hard. Overstuffing can stretch the stitches, tilt the cherry, and make the frosting seam harder to hide. |
How to Make the Finish Look Professional
1. Choose a tighter hook size
For small amigurumi, compact stitches create cleaner edges and prevent white fiberfill from showing between loops. If your fabric looks open, move down one hook size before adding extra stuffing.
2. Keep the liner flat
The bottom of the cupcake should sit relatively flat. If it domes outward, remove a little stuffing and reshape the base with your fingers before the frosting seam is completely closed.
3. Hide the assembly seam
Sew just beneath the frosting scallops. The decorative edge naturally conceals the join and makes the top look as though it overlaps the wrapper.
4. Reinforce the hanging point
Keys and bag charms are handled far more than shelf decor. Run the loop tails through multiple stitches and test the loop before weaving in the ends.
5. Use small decorative stitches
Oversized sprinkles can overpower a miniature cupcake. A few short stitches in two to four colors usually look more polished than covering every inch of frosting.
Color Ideas for Your Cupcake Keychain
- Classic vanilla: kraft-brown liner, cream frosting, red cherry, rainbow sprinkles
- Strawberry: blush liner, pink frosting, berry-red cherry, white sprinkles
- Chocolate: deep brown liner, chocolate frosting, cream drizzle stitches
- Lemon: pale yellow liner, ivory frosting, yellow accent stitches
- Birthday cake: bright liner, white frosting, multicolor sprinkles
- Minimal neutral: oatmeal liner, warm-white frosting, muted tan embroidery
- Holiday version: red liner, white frosting, green and gold sprinkles
For Pinterest-friendly photos, contrast usually works better than matching every component. A warm brown wrapper with pink frosting, for example, reads instantly as a cupcake even at thumbnail size.
Easy Ways to Customize the Pattern
Once you understand the basic construction, this mini crochet cupcake becomes a flexible template. Replace the cherry with a tiny crocheted strawberry, add a short chain “candle,” embroider a smiling face, or make the frosting in two colors. You can also omit the metal ring and use the finished cupcake as a zipper pull, gift topper, Christmas ornament, or small bag charm.
To make a slightly larger cupcake, use thicker yarn with a correspondingly larger hook rather than changing the stitch counts. To make a tiny version, try sport-weight yarn and a smaller hook. Always adjust the hardware to match the scale of the finished piece.
Common Problems and Quick Fixes
| Stuffing shows through | Use a smaller hook, tighten your tension, or remove a little stuffing. |
| Cupcake leans to one side | Redistribute stuffing and check that the frosting seam is evenly positioned. |
| Frosting edge curls too much | Relax your tension on the scallop round; avoid pulling slip stitches tight. |
| Wrapper looks too round | Use less stuffing near the upper edge and gently flatten the base. |
| Keychain loop feels weak | Resew it through several stitches and knot inside the piece before hiding the tails. |
| Cherry looks oversized | Use a smaller hook or work the cherry with lighter yarn. |
Why This Is a Great Scrap-Yarn Project
A cupcake keychain needs only small amounts of each color, so it is ideal for partial skeins left from larger projects. It is also easy to batch: crochet several liners first, then several frosting pieces, then assemble everything at the end. That workflow can be useful when making handmade party favors, teacher gifts, craft-fair add-ons, or small presents.
Because the project is compact, it is also a practical way to test unfamiliar color combinations before using them in a larger blanket, bag, or garment. A successful mini palette can become the starting point for an entire coordinated crochet collection.
Frequently Asked Questions
Is a crochet cupcake keychain suitable for beginners?
Yes. This version is best for a confident beginner who already knows single crochet, increases, decreases, double crochet, and a magic ring. The pieces are small, so careful stitch counting matters more than speed.
What yarn is best for a cupcake keychain?
Cotton, cotton-blend, or smooth acrylic yarn all work well. Avoid very fuzzy yarn for your first version because it can make small stitches and sewing points harder to see.
Do I need safety eyes?
No. This design does not require eyes. If you want a kawaii face, embroidery is a lightweight option and avoids adding bulky hardware.
Can I make the cupcake without stuffing?
You can use very little stuffing for a flatter charm, but a small amount helps the cupcake keep its shape. For a completely flat project, an applique-style construction would be more suitable.
Can I wash a crochet keychain?
If your yarn and hardware are washable, spot cleaning is usually the easiest option. Remove excess water with a towel and let the piece air-dry fully before using it again.
Can I turn this into a bag charm instead?
Yes. Replace the standard split ring with a lobster clasp or swivel clasp. A slightly longer crochet loop can also make the charm easier to attach to a bag handle or zipper.
Final Thoughts
This crochet cupcake keychain is the kind of project that is small enough for an evening but detailed enough to feel special. The separate wrapper, scalloped frosting, cherry, and embroidered sprinkles create a recognizable miniature dessert without requiring complicated shaping.
Make one in classic colors first, then use the pattern as a base for your own combinations. Save your favorite version for yourself, attach one to a handmade gift, or crochet several in coordinating palettes for a sweet little collection.